Turn moderation into an event with a cinematic ban animation, independent timeout cells, configurable positioning, sizing, messages, and a proper event queue.
The extension separates ban events from timeout cells so each system can do its job without getting in the other's way. A queued ban does not create its animation early: when its turn arrives, the whole event starts together from the beginning.
Cart them off in the Ban VanWhen someone is banned, a Jail Truck arrives, picks them up, and drives them off the screenJail cell timeoutsWhen a user is timed out, they get locked up in a jail cell with their timeout duration displayed. When their time is up, they are released.Item queuesBans and Timeouts have their own queues so multiple events do not overlapOBS-ready overlay online or localUse our hosted [[blue: [[overlay:Copy Overlay URL]]]] or download the [[blue: [[overlayzip:Overlay]]]] in a zip file to run locally.
PRODUCT DEMO
See it in action.
INSTALLATION
Get the extension running.
Import the Streamer.bot actions, enable them, add the overlay to OBS, then test the extension.
01Import the extension into Streamer.bot
Open Streamer.bot and use Import to paste the supplied import string, or download the latest import file and import it into Streamer.bot.
.1Copy the import string
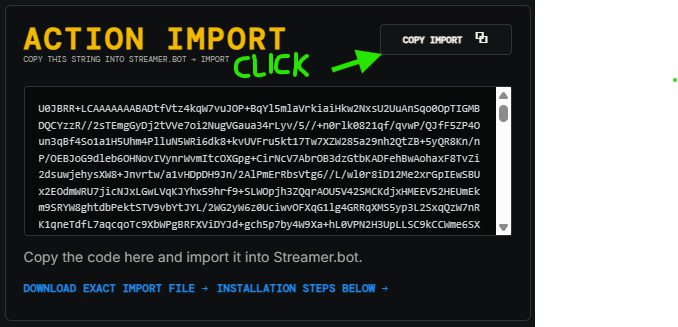
Look above for Action Import, click the [Copy Import ⧉] Button, then paste the import code into Streamer.Bot's Import dialog.
.2Open Import
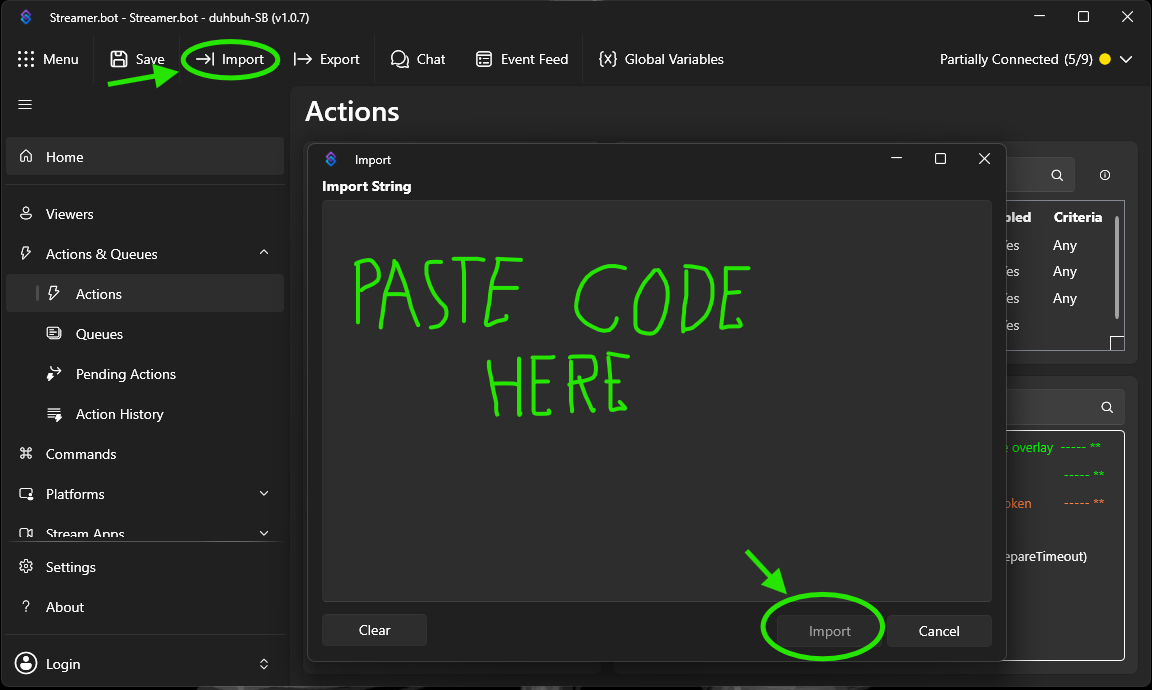
Select Import from the Streamer.bot toolbar.
.3Paste the import code
Paste the supplied import string into the Import String box, then select Import.
.4Confirm the import
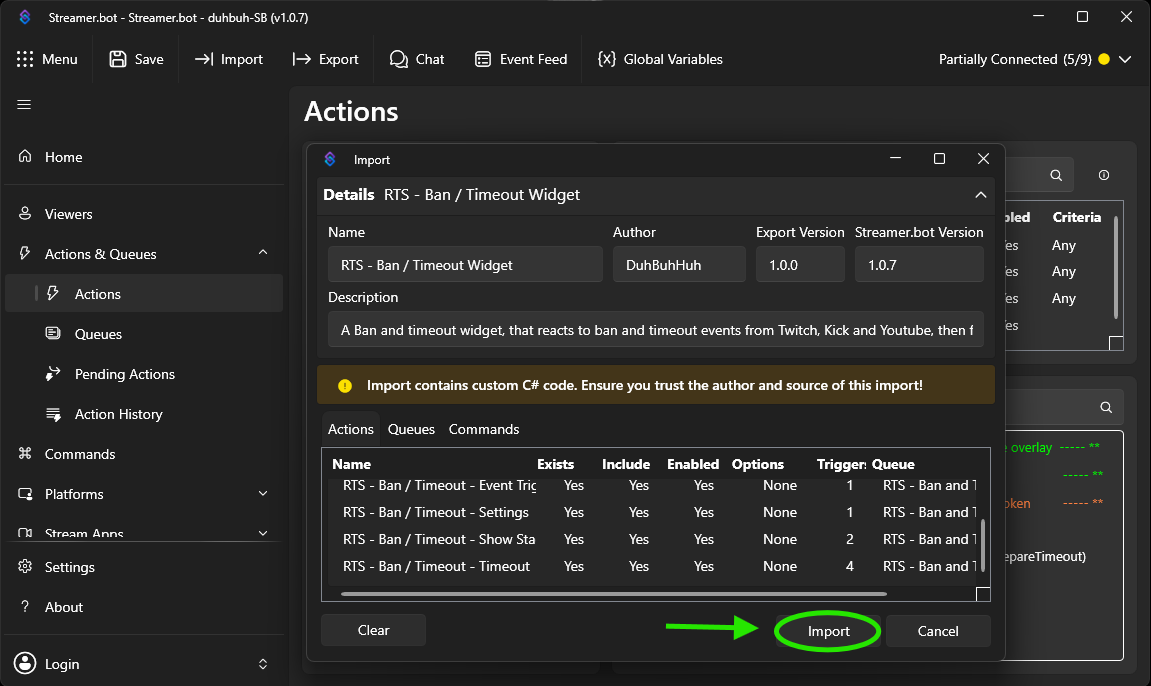
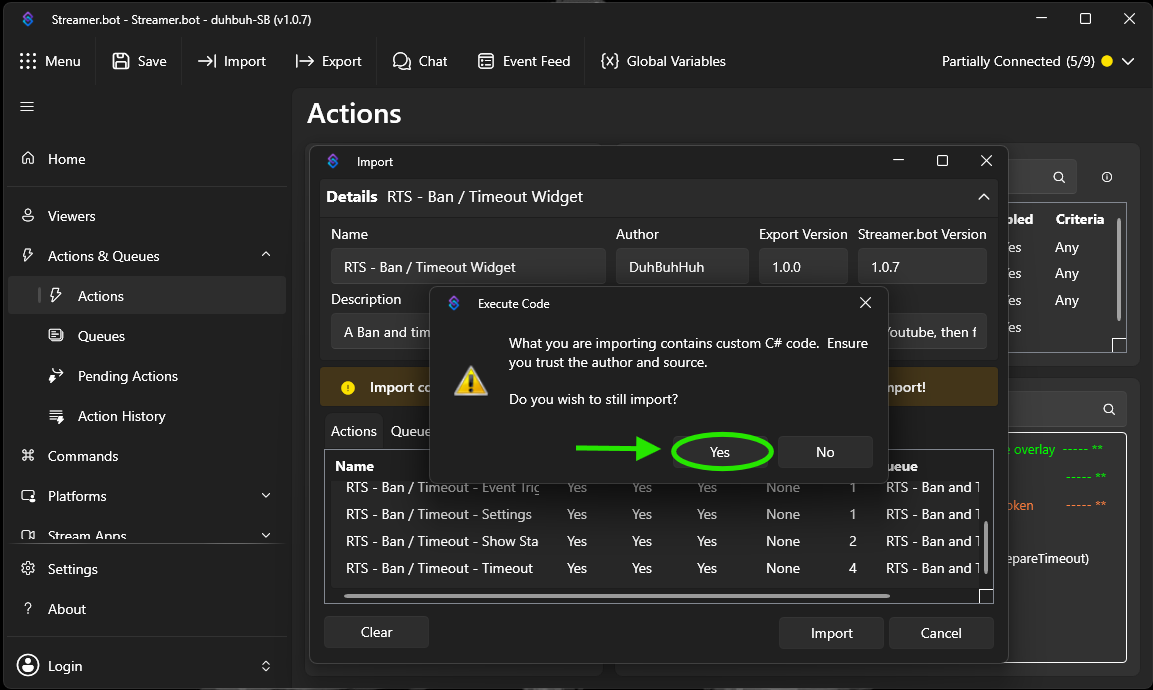
Review the actions being imported, then select Import to continue.
02Enable the imported actions
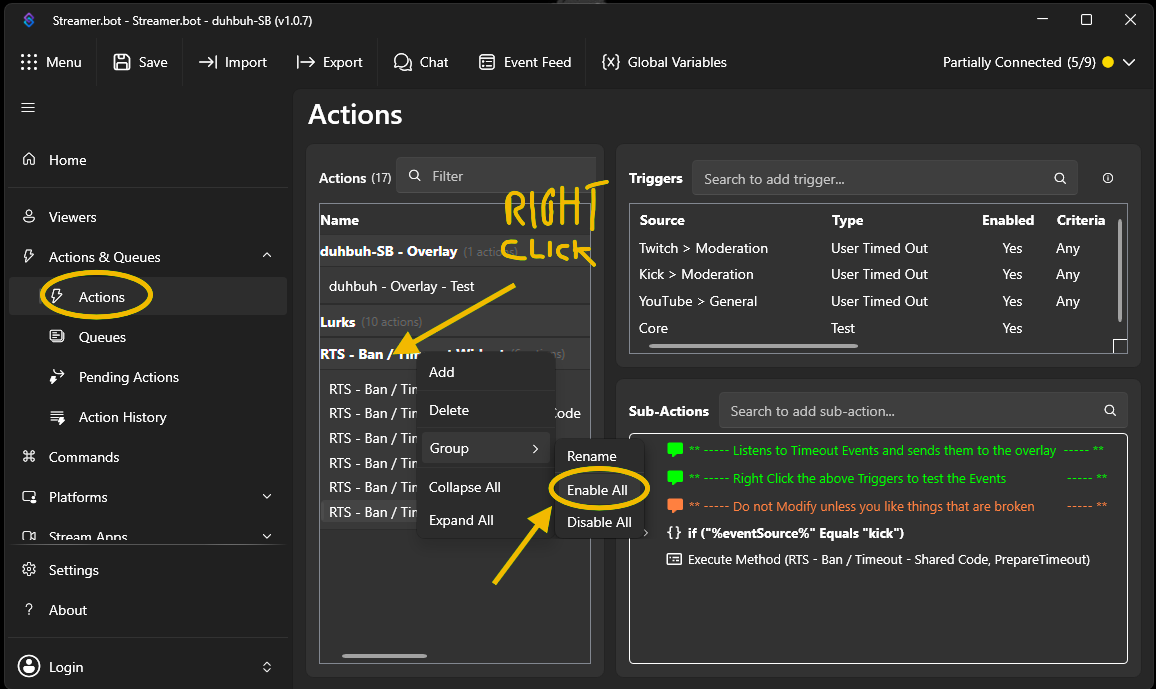
Enable the imported RTS actions so the extension can respond to events.
.1Enable the extension actions
Enable the imported RTS actions in Streamer.bot.
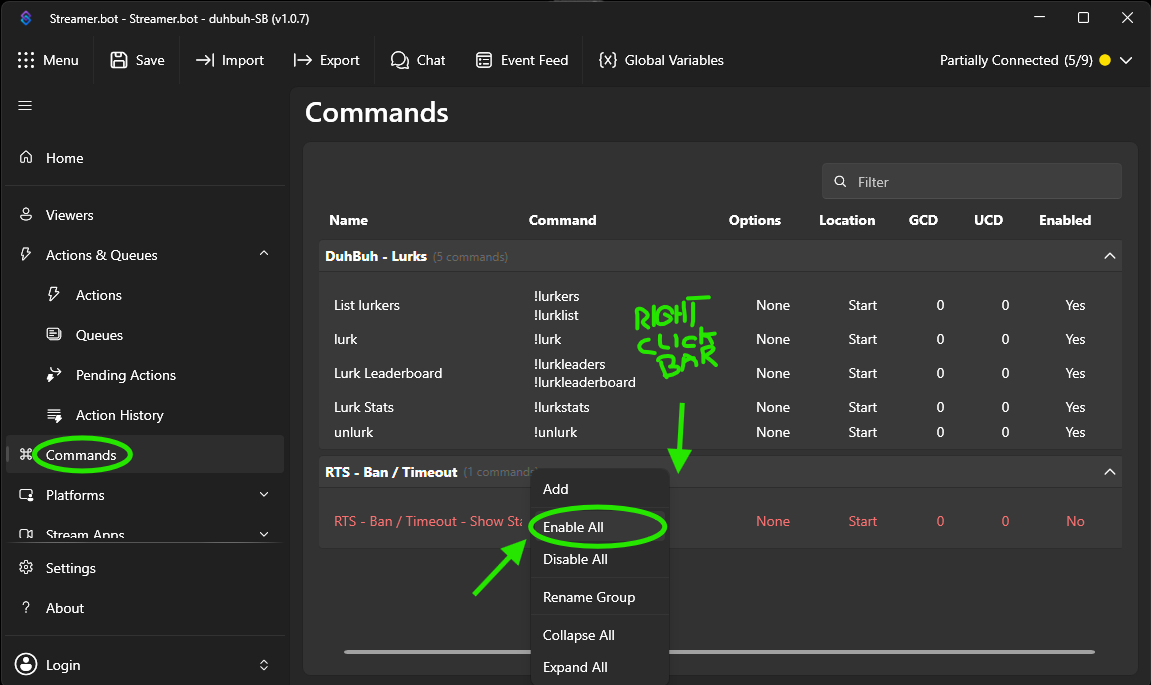
.2Check and Enable the commands
Confirm the imported extension commands are present and enabled where required.
03Add the extension overlay to OBS
Add the extension's hosted overlay URL as an OBS Browser Source, or use the supplied local overlay files.
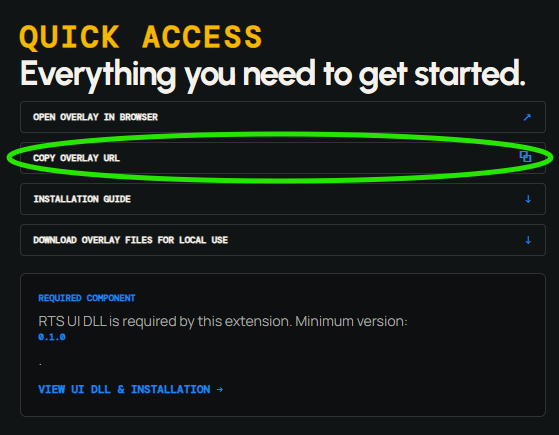
.1Copy the Overlay URL
Look above in the Quick Access section and click the [Copy Overlay URL ⧉] Button. This will copy the overlay URL to your clipboard for use in OBS.
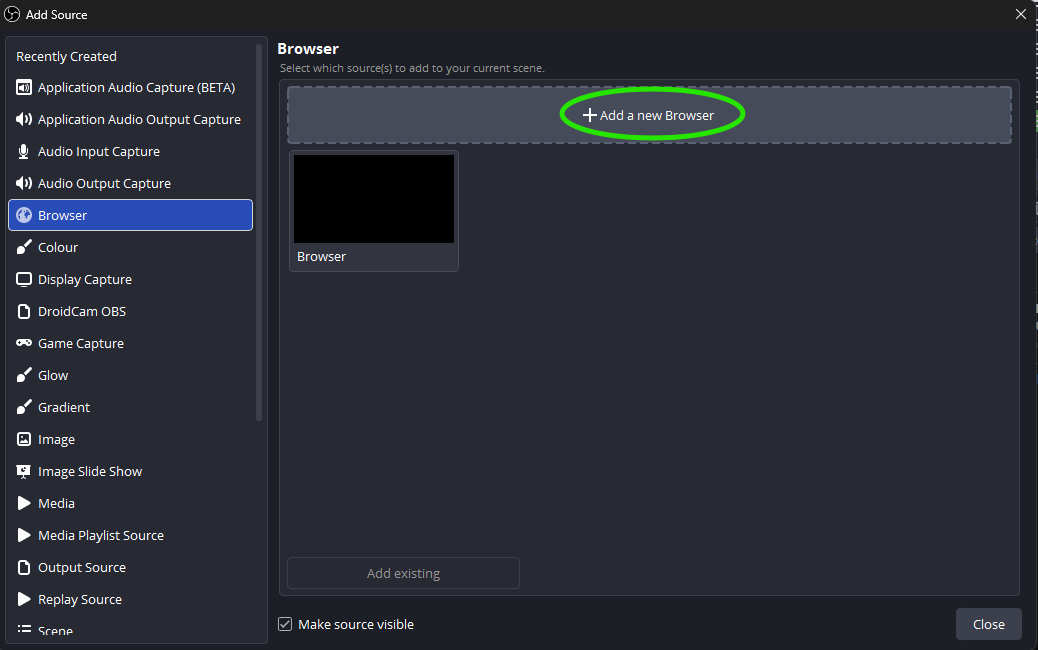
.2Create a browser source
Add a browser source to an existing or newly created scene in OBS.
.3Configure the browser source
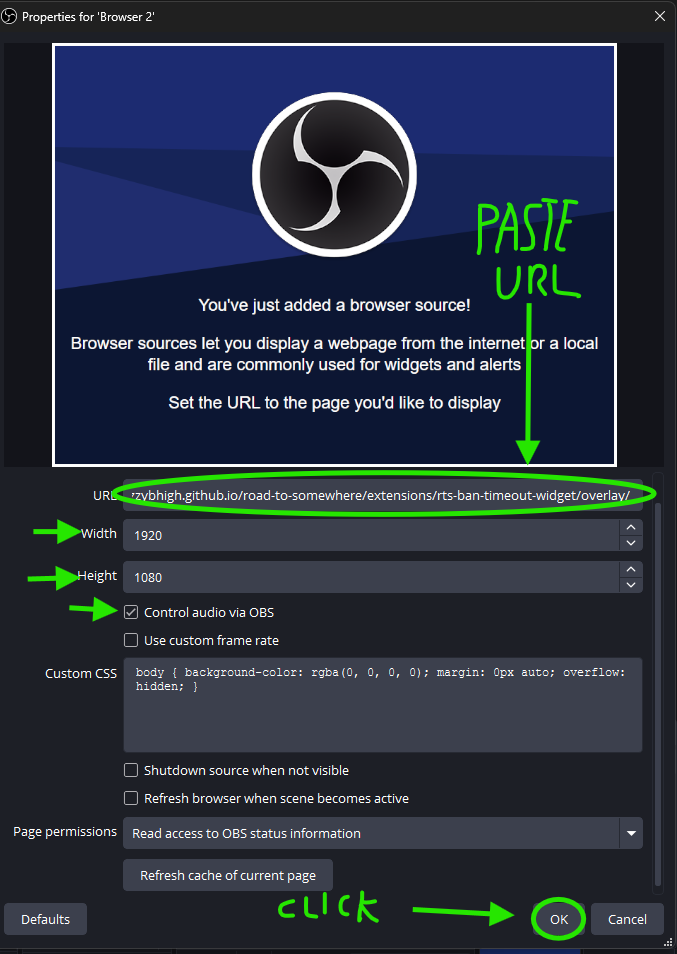
Paste the Overlay Url you just copied into the URL field, then set the width and height to 1920x1080 or your screen size if its diffirent make sure you dimensions that are 16:9 or the overlay will be distorted, and check Refresh browser when scene becomes active.
04Configure Settings and Test the extension
In the Actions Panel, look for Extensions Settings Action.
.1Open the settings dialog
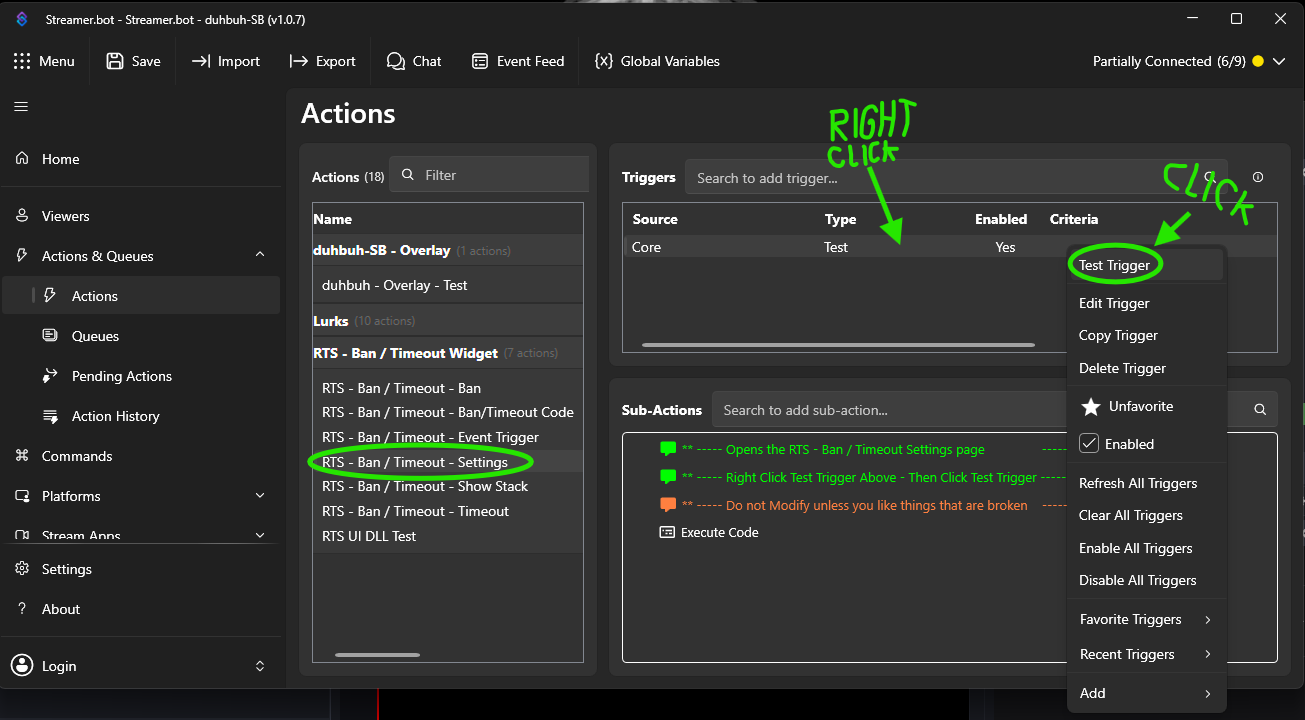
In the Actions Panel look for Extensions Settings Action and click to select it, Right click the the trigger called 'Core Test' and click Test Trigger top open the dialog
*Automatic Installation of the RtsUI.dll
If you do not have the DLL installed, the extension will download and place it in your Streamer.bot installation directory.
*Automatic Updating of the RtsUI.dll
If the extension requires an updated version, it will ask you if you want it to download and install the latest version.
SETTINGS UI
Configure the widget for your scene.
The settings UI is provided through the Road to Somewhere UI DLL. These descriptions mirror the released extension settings so users can understand what each control changes before they install it.
Ban presentation
Ban Van SizeControls the scale of the ban vehicle.
Large 100% · Medium 85% · Small 70% · Extra Small 60%
Ban Van Vertical PositionMoves the ban vehicle up or down within the available range.
0–100 · Default 50
Ban Message VisibilityShows or hides the ban reason/message.
Ban Message SizeControls the scale of the ban message.
Large 100% · Medium 85% · Small 70% · Extra Small 60%
Ban Message Vertical PositionMoves the ban message up or down within the available range.
0–100 · Default 50
Ban Message Arrival StyleControls the arrival-style presentation used while the vehicle enters.
Timeout stack
Timeout Stack ScaleControls the size of timeout cells once they move into the stack.
10–100% · Default 33%
Maximum Docked TimeoutsSets the maximum number of timeout cells that can remain stacked.
1–25 cells
Timeout Stack Edge OffsetControls the distance between the timeout stack and the overlay edge.
0–200 px
Timeout Stack GapControls the vertical gap between timeout cells.